Guide to the Arduino Nano
This is a preliminary guide and will be updated and expanded in the next few days.
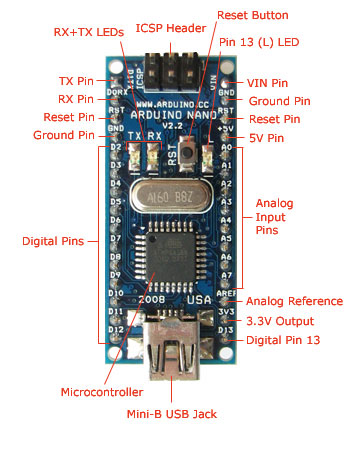 |  |
The various components of the Arduino Nano.

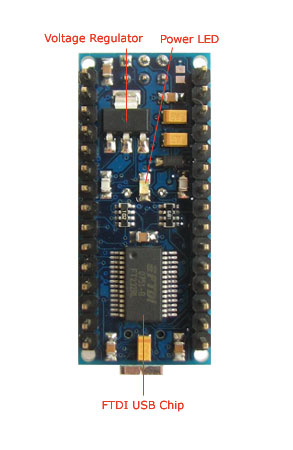
Connecting the Arduino Nano to a computer with a Mini-B USB cable. Note the blue power LED underneath the board.
To connect the Arduino Nano to your computer, you'll need a Mini-B USB cable. This also provides power to the board, as indicated by the blue LED on the bottom.
To upload a sketch to the Nano, make sure you have the Arduino Diecimila option selected from the Tools > Board menu and the correct serial port selected from the Tools > Serial Port menu. Then simply press the upload button in the Arduino environment. The board will automatically reset and the sketch will be uploaded, as with the Arduino Diecimila. If you have any problems, see the troubleshooting guide.
For more details on the Arduino Nano, see the hardware page. The text of the Arduino getting started guide is licensed under a Creative Commons Attribution-ShareAlike 3.0 License. Code samples in the guide are released into the public domain.